

Vinyl cutting (in the context of design and print) is the automated cutting of self adhesive vinyl on a CAD cutting machine. The vinyl can either be a roll of stock colour or printed with a design on an inkjet prior to the cutting process.
The vinyl cutting machine feeds the roll backwards and forwards through pinch rollers while the blade travels left and right, cutting through just the top layer of the self adhesive vinyl. Once cutting is finished, the vinyl is removed from the machine and the unwanted vinyl areas are removed manually – a process known as “weeding”.
Because of the fiddly nature of weeding away tiny areas of vinyl from the design, there are limits to how small and complex the design can be. For example, a piece of text in Helvetica Regular at 55pt would be considered too small for cutting.

As a general rule of thumb, no individual shape of vinyl should be smaller than 2mm square. Not only is it difficult to weed anything smaller than that, but also there isn’t enough adhesive on the back of a piece of vinyl that size to successfully stick it to the final surface.

Using this rule on the typeface Helvetica Regular, the smallest font size should be 63pt. However, if you decide to use Helvetica Bold instead then you could go as small as 44pt. This is because the bolder style means that the dots on the lower case “i” are still over 2mm square even at 44pt.
The “2mm square” rule applies to graphic objects in your design too, so quite often the easiest thing to do is to print out a section of your design at the actual size on your home printer and hold a ruler up to it just to confirm that none of the elements are below 2mm.
Only vector paths can be cut
One of the most common issues when preparing an artwork file for CAD cutting is the fact that a cutting machine can only follow vector paths – that means no pixels. This means JPG’s, PNG’s, TIF’s and GIF’s are all out of the question, because they are all made of pixels. What you need to create are SVG’s, AI’s, EPS’s or PDF’s – as long as they are only made of vectors.

I would recommend using Adobe Illustrator if at all possible, there are some useful features built in that help you make a good vector file ready for vinyl cutting. One useful trick is to view your artwork in wireframe mode, which you can do by selecting “Outline” from the “View” menu in Illustrator.
If you look at the screenshots below, you will see that in normal view on the left the artwork looks perfectly OK and ready for cutting. But the same artwork in “Outline” view shows a couple of issues that need to be rectified before the file will work on a CAD cutting machine.


Viewing this file in outline mode shows that there are two issues that will need to be rectified before it can be used on a CAD cutter.
Firstly, the lettering in the middle of the artwork that reads “XYZ Company” is actually not lettering – but a placed image. It is showing up as a box with a cross on it. This will need to be redrawn, or at least autotraced to produce the vectors needed for cutting.
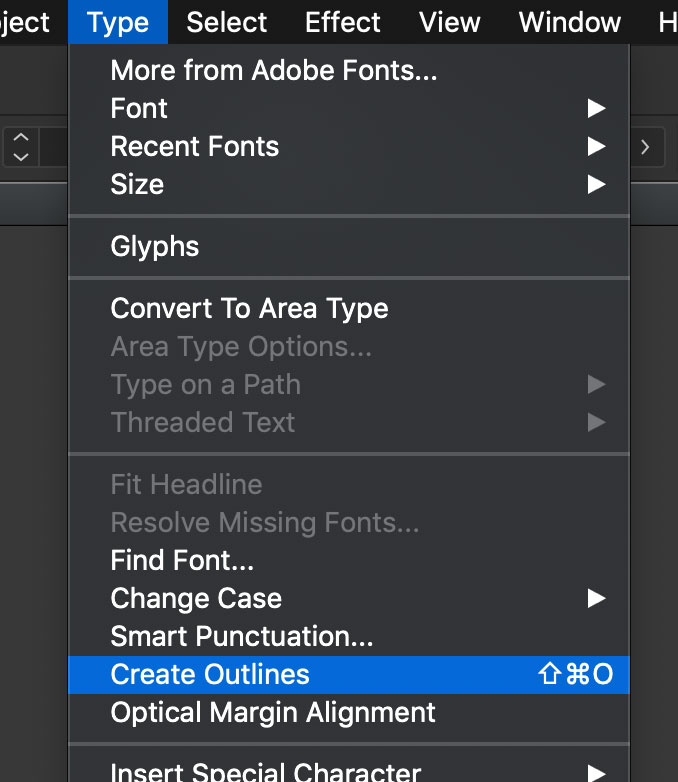
The other issue is not so obvious. The font cannot be cut while it is still in text form like this, it needs to be converted to outlines. Fortunately this is a very simple operation. With the selection tool, select everything on the artwork and then choose “Create Outlines” from the “Type” menu. This will convert all the fonts into vector shapes that the cutter can follow.
Now, if we look at the outline view we can see that the file is made totally of vector paths, and is ready to send to the CAD cutter.

Overlapping shapes
Viewing your artwork in outline mode often shows up another issue that will need to be resolved before a successful vinyl cut can be performed, and that is overlapping shapes.
On a printed job, overlapping shapes is not normally a problem, especially if they are the same colour. But when cutting a file, the cutter will religiously follow every vector path in the file, even when it seems obvious to you or I that the overlapping area does not need cutting.
This happens surprisingly often with certain fonts. You can see from the screenshots below that although the script font seems perfectly OK in normal artwork mode, when you view the file in outline mode you can see that where the letters touch there is an unsightly mess of paths, that will end up being cut if we do not do something about it.


Believe it or not, this is how some fonts are designed to work, and most of the time it is OK. Fortunately there is an easy solution in Illustrator. Make sure you have the “Pathfinder” pallet visible on your screen, then with all the offending shapes selected choose the “Unite” icon in the “Shape Modes” section. This will magically convert all those overlapping shapes into a single flowing path.

This will have no effect at all on shapes that are not overlapping as long as they are the same colour, so feel free to be quite liberal when applying this tool to your artwork. I often do a “Select all” and then “Unite” just before saving the file for cutting.
Print & Cut
The only exception to the “no pixels” rule is print-&-cut vinyl. This is where the vinyl is printed first on an inkjet printer before being fed into the cutting machine.
The printer automatically leaves registration marks outside the print area along the edges of the design, and the cutter uses its optical sensor to read these marks and automatically compensate for any skew or distortion that may have occurred during the printing or loading process.
Setting up your artwork for print-&-cut involves including a spot colour in your file (normally called “Cutter”) that you can use for all the elements that need to be cut.

You can make a new spot colour in Illustrator by selecting “New Swatch…” from the “≡” menu on the Swatches palette. In the dialogue box that appears, name the colour “Cutter” and make sure that you choose “Spot Color” from the pull-down Color Type menu. The Color Mode does not matter, nor does the actual colour you choose because ultimately this will not actually be printing.
The printer will not print this spot colour, but instead sends it to the cutting machine, where it waits until the vinyl has finished printing. All other colours will print as normal, as well as the required registration dots and identifying barcode, which are added by the RIP. The cutter software then reads the barcode, identifies the appropriate cut file and begins cutting.

One thing you need to remember to do is make sure you set the Cutter to overprint. This is done by selecting the objects and setting them to overprint in the “attributes” pallet. Otherwise, although the printer will not print the cutter colour, it will not print any image that is behind the cutter colour, resulting in a white line where the cutter should be.
Although the cutter is very accurate at following the cutter paths it is sent, there is the possibility of it being slightly out of alignment by up to 1mm. It is for this reason that you should continue the printed image slightly beyond the cutting path. This technique is known as adding “bleed” to the job.
Multiple coloured vinyl

If you are setting up an artwork for multiple colours, be aware that each colour will need to be cut separately and then built up in layers after they have been weeded. the best way to do this in Illustrator is to take advantage of the layers feature.
On the screenshots below you can see that I’ve created three layers in Illustrator that I can use to help me keep each colour separate from each other and to ensure that when I lay them together after cutting I will get the correct result.


Although what I am calling the “white” layer is actually green on the screen, this is just so that I can see it on the Illustrator document. Obviously it’s down to what colour vinyl I load into the cutter that decides what colour it will actually end up.
I have drawn the artwork so that he white circle (shown in green) is slightly bigger that the inside of the red ring that will sit over it on the final job. This is so that they can be aligned successfully when the job is assembled after cutting. You will also note that the black items continue uninterrupted behind the diagonal red line. These techniques are know in printing terms as “trapping” and “overprint”.


You can see where the layers of vinyl have built up to form visible ridges where they overlap. This is not always desirable, so its is often worth considering the alternative method of print & cut (mentioned earlier in this article).


Be the first to comment